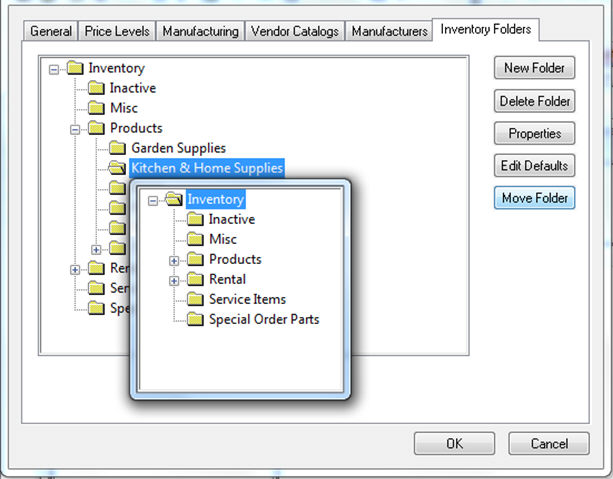
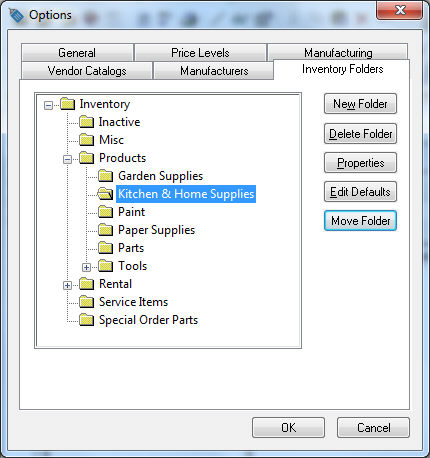
Inventory can be grouped as a catalog containing product
groups and subgroups as shown below:
Information is organized within folder groups within the software. These groups are valuable when organizing data such as inventory items, customers, or vendors. Some common grouping within the software is as follows:
Inventory can be grouped as a catalog containing product
groups and subgroups as shown below:
Go to Inventory >
Options > Product Folders to view the product folder group.
Review the Inventory Items > Adding and Deleting Inventory Folders
section of the Inventory Manual for more details on creating a catalog
of products.
Customers may be grouped for marketing purposes or mailing lists as
shown below:
: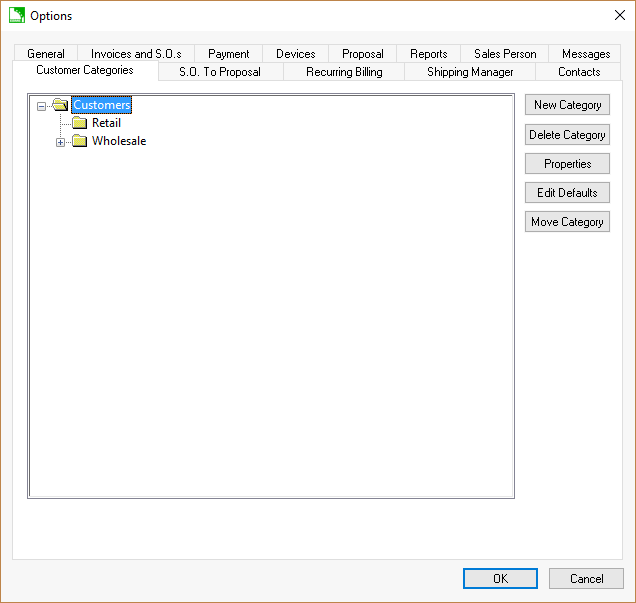
Go to Sales > Options > Customer Folders to view the customer folder settings. Review the Sales > Customers > Adding and Deleting Customer Folders section for more details.
The General Ledger chart of accounts are organized by folder groups. Go to Financials > Options > General Ledger Folders to organize the G/L chart of accounts by folder.
Vendors are organized by folders in a similar way as customers. Go to Expenses > Options > Vendor Folders to configure the vendor groups.
The payroll system contains many folder groups such as employees and work codes. Review the payroll manual for more details.
Some modules use the folder grouping within multiple levels. For example, within the job costing module, the jobs can be organized in folder groups, and the stages within individual jobs are organized using folder groups. Review the job costing manual for more details.
The root folder in our customer example is labeled Customers with sub-folders named Retail and Wholesale. You can insert folders within folders. In our example, we have three folders named General Contractors, Masons, and Roofers within the folder named Wholesale. It is recommended that you do not nest folders more than 5 levels because of report restrictions.
Sub-folders within the inventory system are especially powerful since the user can organize thousands of items in an orderly way so items can be found even if the user does not know the inventory item ID.
The Add Folder button is used to add an additional folder to the folder list.
Select the folder that will house the new folder and press the New Folder button.
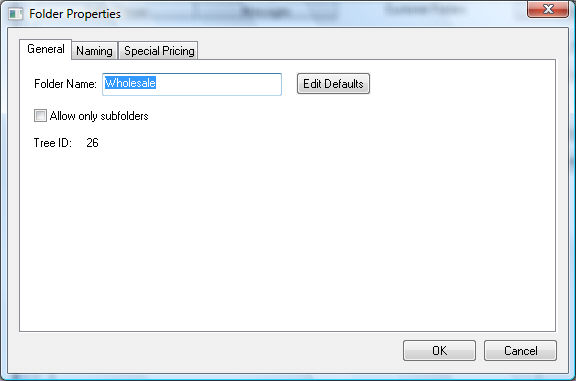
A folder Properties
dialog will open, allowing you to enter the new folder name.
The Allow only subfolders switch should be switched ON if you do not want to insert any information into the folder itself but only allow subfolders. This is useful when planning your folders and requiring the user to place all data in subfolders rather than parent folders. In the example above, the user will not be able to place customers in the Distributor folder. The Distributor folder will only be useful to insert subfolders.
The Tree ID is used to within records to identify the folder group. The Tree ID number can be used to query the items within a folder group. Review the Advanced Query Options section for more details on query settings.
This dialog may include some other information that is related only to the specific list. For example, the General Ledger Folders include a pair of Allowable Range entries.
Review the Creating and Changing ID's section for more details on the Naming tab. Other tabs may appear such as Special Pricing. Refer to The Special Pricing manual for details on advanced modules.
Save folder information by clicking OK.
If you press the Delete Folder button, the folder that is highlighted will be removed. A folder must be empty before it can be deleted. Note that the root folder (the top of the list) cannot be deleted. These are system folders and should not be removed.
The Properties button allows the user to edit the folder properties.
The Edit Defaults button activates the defaults window that can be used for two different powerful features-to edit defaults and to globally change information. Review the Setting Customer Defaults section for more information on customer defaults. For details on additional sections for other module folders, review the Setting Vendor Defaults section or the Setting Employee Defaults section within the payroll manual.
The Move Folder option allows the user the to change the location of a folder. Select a folder and press the Move Folder button. Choose the folder you wish to place the selected folder inside of.